BowlsLink’s Events feature lets clubs manage bookings and registrations for off-the-green activities. It’s simple to set up and completely online. This system significantly reduces paper usage, making your booking process nearly paperless. Once bookings are made, you can easily view them all in one place and export the details to Excel.
Creating an Event #
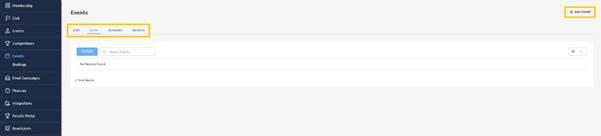
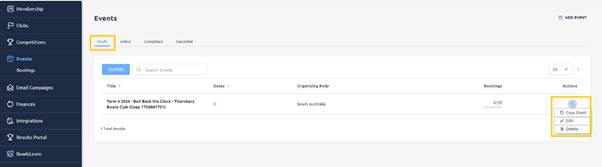
To create an Event, firstly click on ‘Events’ on the left-hand navigation menu. This page will default to Active events but also show options to select Draft, Completed and Cancelled Events.
From here, click ‘Add Event’ on the top right-hand corner to begin.
There are seven (7) menu items to setup as part of the event creation. Below is a guide on each page and what they require to create and finalise an event.
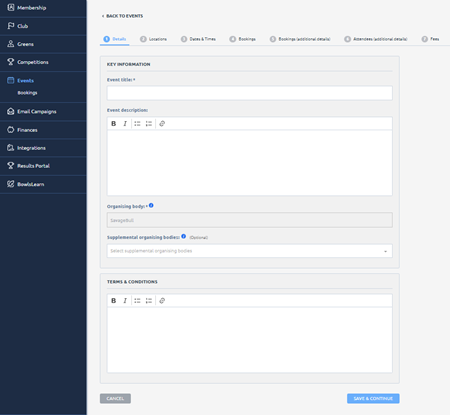
Details #
Here you will begin to create the basic structure of your event. This is the Key information about the event you want to take bookings for. Make sure the title is clear and easy to understand.
With Event Description and Terms and Conditions, this is a free text box for you to put in as many details as you want. You can include links to a website in these two boxes as well.
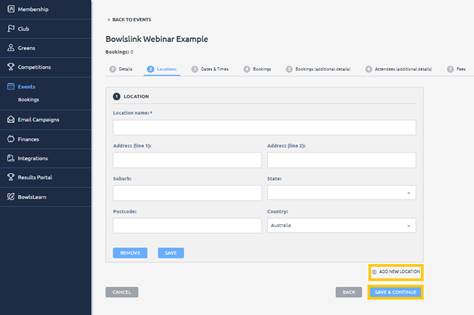
Locations #
The Locations tab is for you to put in the location of your event. The name is the only required information, but putting the whole address in can help your attendees know where the location is.
You can add multiple of locations by click + Add New Location.
Make sure you press Save after you put the location in.
Once done, click Save & Continue.
Dates & Times #
Here you can set the specific time and dates of your Event.
Time zone – will default to your location.
Sessions – This is where you pop the date in for your event. Note that the times are in 24 hours times.
You can add multiple dates via the ADD button.
Note: At least one session that identifies the event’s start date/time and end date/time must be defined.
If an event has multiple sessions, the event’s start date/time will be identified by its earliest commencing session, and the event’s end date/time will be identified by its latest terminating session
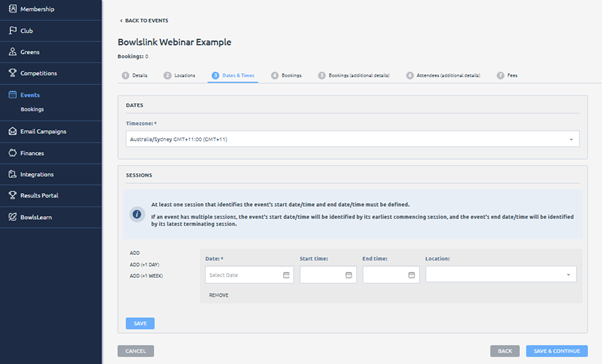
Remember to Click Save before you click Save & Continue.
Bookings #
The bookings page is where you put all the details for what the bookings page will look like and ask the people booking.
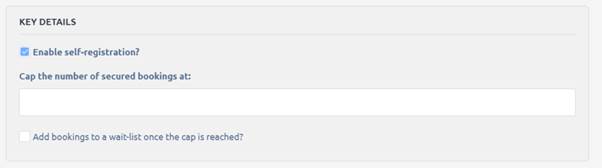
Enable self-registration when checked will let people register for your event.
You can put a cap on the number of how many bookings, by typing the number in the box and pop on a wait list once the limit has been reached.
The event mailing list is a great feature you can use to email the attendees register via the Email Campaigns section in BowlsLink. If you switch it on via the slider, it will create a list in the Email Campaign section.

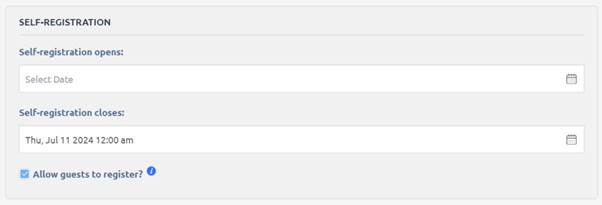
If you allow self-registration, you can put on dates ranges on when bookings can be accepted. You don’t need to put any dates in, but always best for put a close date in, so you don’t receive any last-minute registrations.
Allow guest to register is an option and great if you will be having non bowling members register for events.
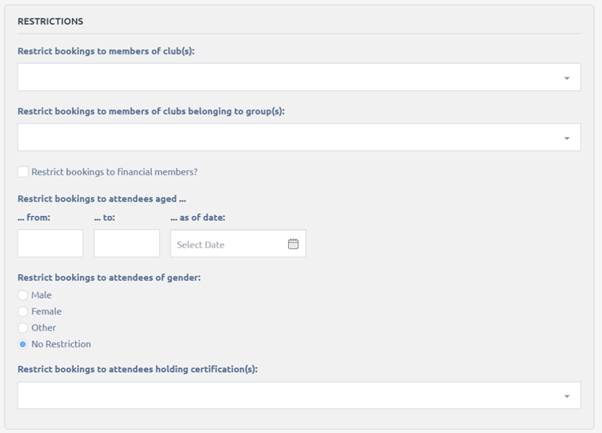
The restrictions section is an option you can put on restriction for your event.
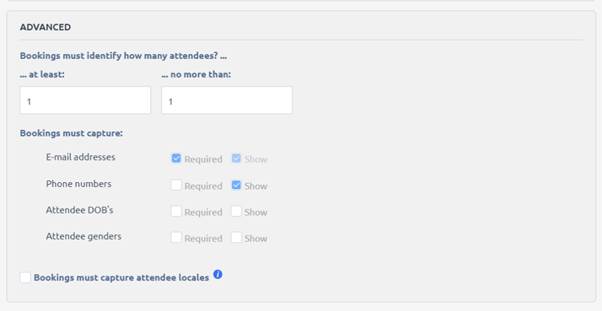
The advanced section lets you put on how many people per booking you will accept.
Also, can state what you want to capture and what is a requirement.
Then click Save & Continue.
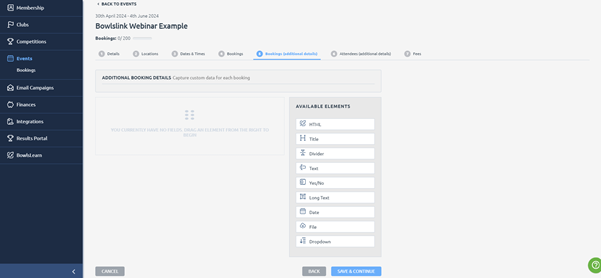
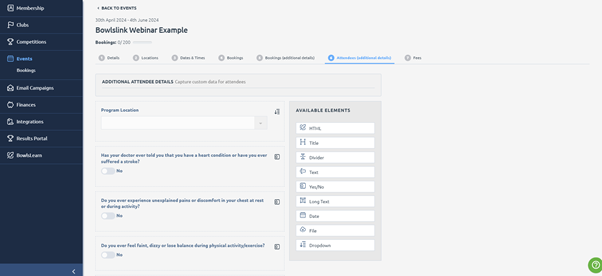
Additional Details #
The next two tabs are the additional details section where you can ask additional questions you have for the whole Bookings (ADDITIONAL BOOKING DETAILS) and Attendee Questions (ADDITIONAL ATTENDEE DETAILS).
You can select the type of element you want to ask the question from the right-hand side, by clicking it or clicking and dragging it over. You can make them a requirement to answer or not.
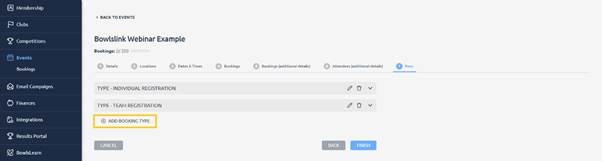
Fees #
In the fees section, you can add ticket prices, or you can leave it blank and get payment a different way if it is not a free event.
To add fees, firstly you need to add a booking type by clicking + Add Booking Type
You will fill out the booking type. Then click Save
Once the Booking Type has been created, you then can go and add the fee associated with this booking type. Do this via clicking + Add Booking Fee.
Note: What you call it will show up on the registrants end when they are booking the tickets.
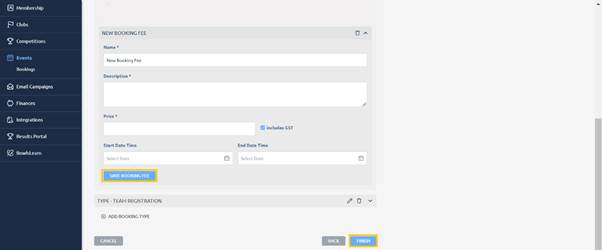
Click Save Booking Fee when done.
You can then add more Booking Types for more number of ticket options, by following the above steps.
Once all fees are in, you can click finish
Now that you have set up your event, it will go into the draft tab, you will need to change the Status of the Event to Active to start receiving bookings.
Click the spanner against your event and choose Edit.
Go down to you see the Event Status and change it from Draft to Active.

Then scroll down and click Save and Continue.
You can then click back on events from the menu bar and go to the active events.